

Route the Wavix number
- In Wavix, open Numbers & Trunks → Trunks → Create new. Select Digest, set a password, and select the Wavix number as Caller ID. Save the trunk and note the SIP trunk ID, which is the login for outbound calls, and your regional gateway, such as
us.wavix.net. - In Famulor, open Settings → Phone numbers → Add a number → Add SIP integration. Choose the SIP region, copy the hostname from the SIP URI, and enter the exact
+E.164DID. Use the Wavix gateway as Termination address and the trunk ID and password for Outbound authentication. Choose Provider source IPs for inbound. Select International (with +) for the outbound caller ID. - In Wavix, under Numbers & Trunks → My numbers, choose Edit number for the DID. Set the inbound destination type to SIP URI and enter
[did]@5wxj7da18ea.eu.sip.livekit.cloud;transport=tcp. Keep the[did]token so Wavix inserts the called number. Replace the hostname with the one copied from Famulor. Save and assign the number to an assistant.
What to enter in Famulor
The screenshots use the English app labels.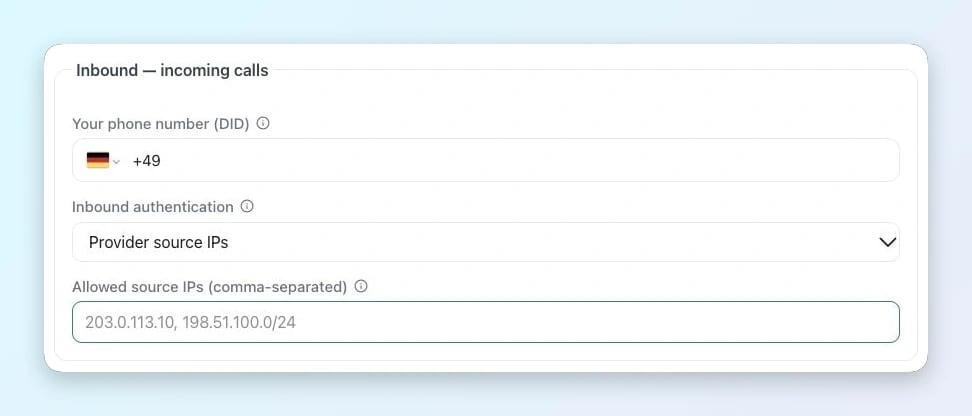
Incoming calls in Famulor
- Your phone number (DID) · Enter the exact number delivered by Wavix, with its country code and leading + for an E.164 DID.
- Inbound authentication / Allowed source IPs · Choose Provider source IPs and enter the complete SIP signaling list for Wavix and the selected route.
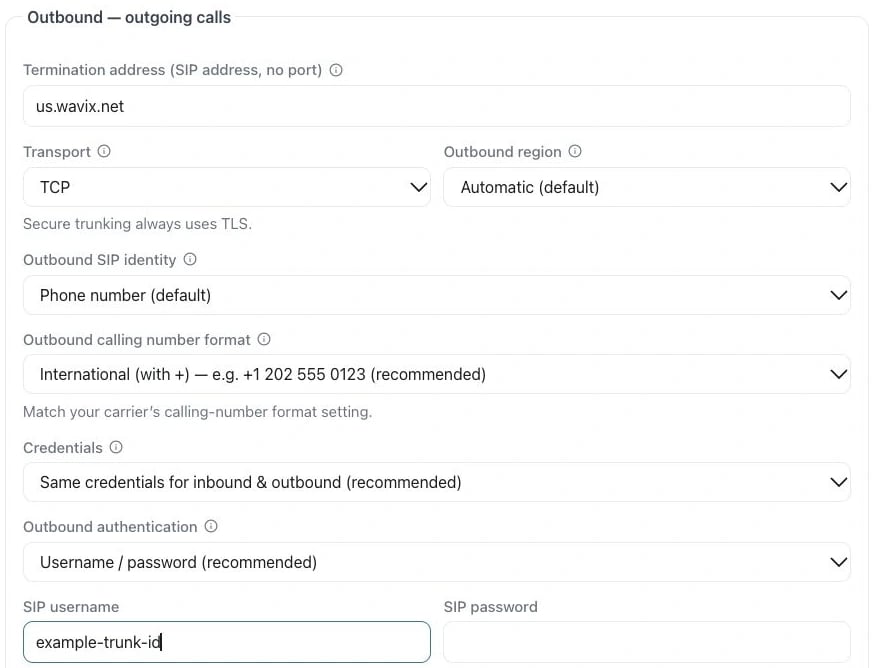
Example in the English app
- Termination address · Use the provider hostname from the setup above (us.wavix.net). Enter only the hostname, without a SIP prefix or port.
- Outbound authentication / SIP username / SIP password · Select Username / password when using Digest. Enter the SIP login and password from Trunk ID / Digest.