

- Calendar integrations — connect an external scheduling provider (Acuity Scheduling, Cal.com, Calendly, eTermin, HighLevel, meetergo) once, assign it to an assistant, and the assistant automatically gets booking tools for every call. Google Calendar and Outlook connect in the same place, but they feed the built-in engine’s calendar sync rather than mid-call booking — see the note under the table.
- The built-in booking engine — define your own event types with weekly availability and get a public, embeddable booking page at
/book/{workspace}/{slug}, ICS invitation emails, and anativeintegration your assistants can book against. No external account required. See Built-in calendar for the full picture.
Providers at a glance
Google Calendar, Outlook, CalDAV, and ICS feeds are calendars for the built-in booking engine, not mid-call booking providers. Connecting them makes their busy times — and for Google, Outlook, and CalDAV, event write-back — available to a native event type. Assistants cannot call them directly during a conversation. To book on those calendars mid-call, assign My booking calendar (that event type) to the assistant, or put a Cal.com, Calendly, Acuity, or HighLevel calendar in front instead.
Calendly link mode: Calendly’s Scheduling API requires a paid Calendly plan. If your plan cannot book directly, set the integration’s
booking_mode to link — the assistant then agrees on a rough time with the caller and sends a single-use scheduling link by SMS or email (link_channel) instead of hard-booking. Integrations that hit the paid-plan restriction at call time are flagged with status link_mode.Connecting an integration
Go to Booking → Integrations and pick a provider card: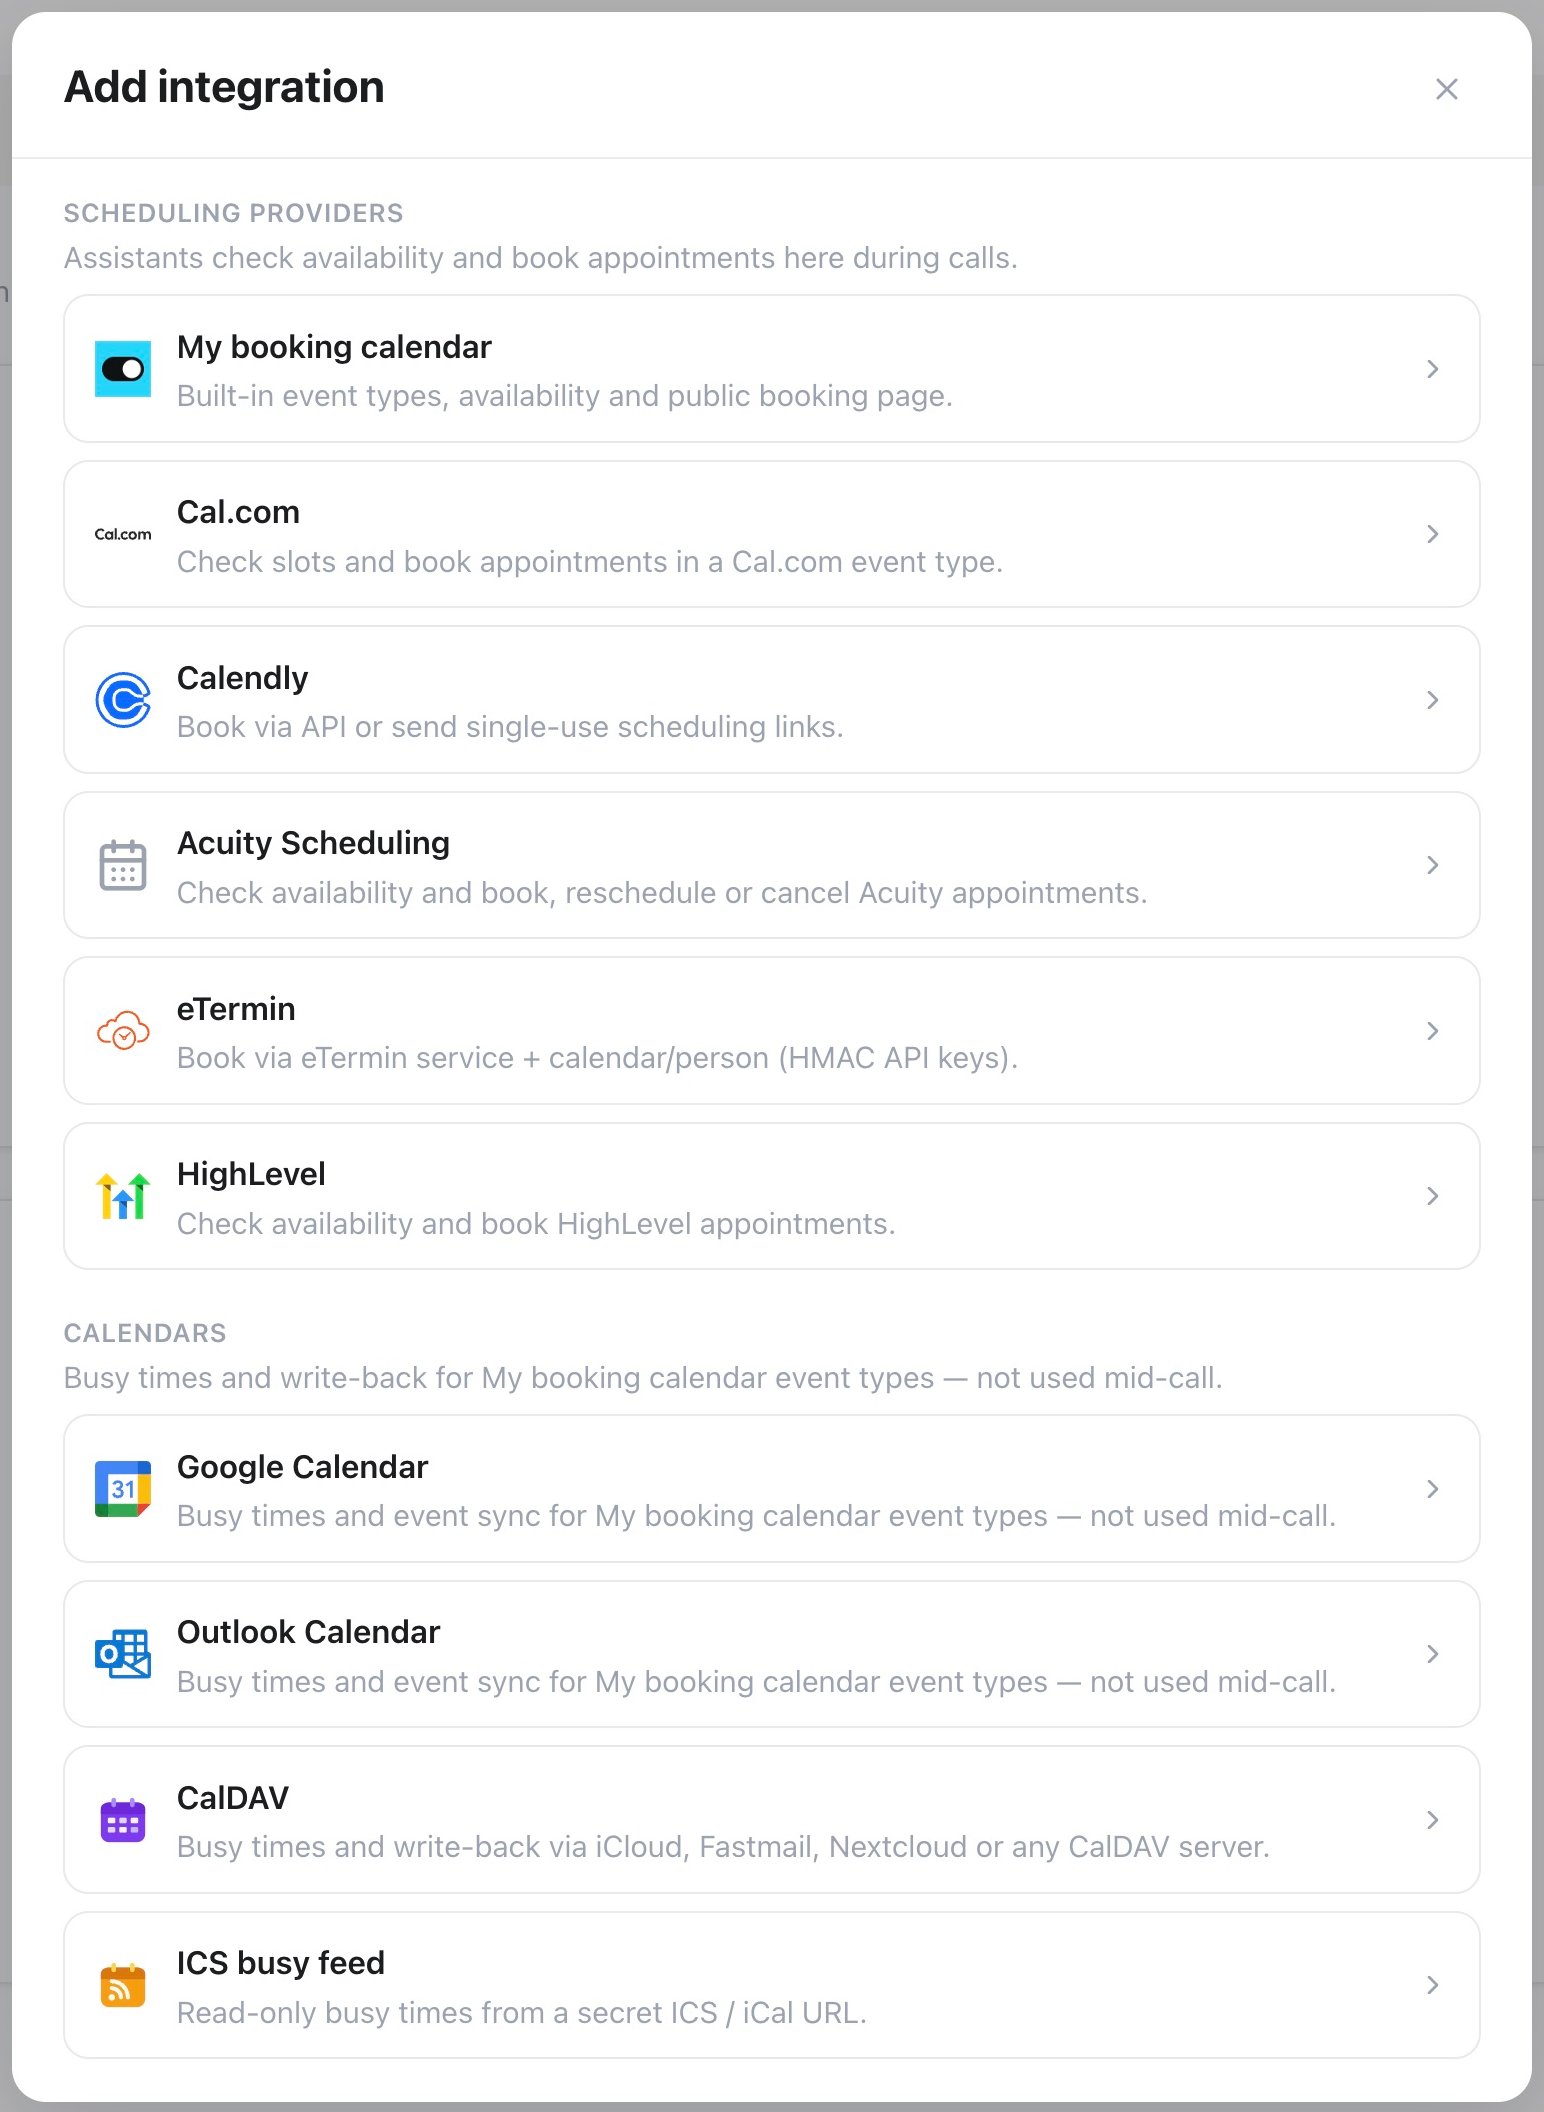
Booking integrations — choose your calendar or scheduling service
- Cal.com
- Calendly
- Acuity Scheduling
- eTermin
- HighLevel
- Google / Outlook
- Native
Paste your API key (Cal.com → Settings → Developer → API Keys) and pick the API endpoint: US (default), EU, or Custom for a self-hosted Cal.com instance. Select Load event types to fetch your events by name and duration — no need to copy a numeric ID from the URL. Optional timezone override — make sure it matches the Cal.com event type.The selected event type’s booking questions and required fields load automatically. Voice and messaging assistants collect the phone number and custom answers when the event type requires them. To update an existing connection, open it for editing under Booking → Integrations, review Booking questions (or use Refresh fields after changing them in Cal.com), then select Save changes.Enable or disable Book, Cancel, and Reschedule for each integration. With Cancel or Reschedule on, callers don’t need a booking number: the assistant finds their upcoming booking by the phone number they call from, or by the email address and full name used when booking.
Assigning to an assistant
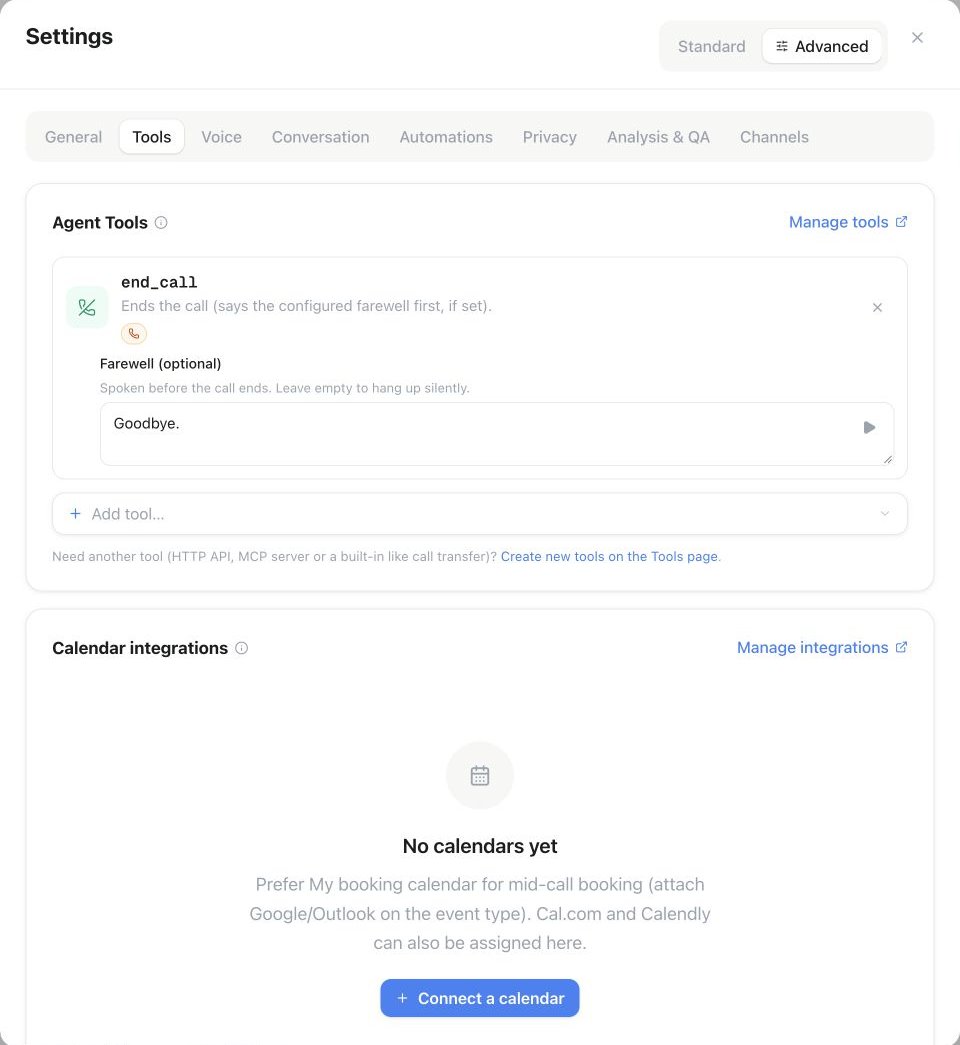
Assistant Settings → Tools → Calendar integrations: select Connect a calendar to assign a booking integration to this assistant.
PUT /api/v1/assistants/{id}/integrations). Each assigned integration adds its own booking tools to every call:
Every integration gets
check_availability; booking is exposed when enabled for that integration. The management tools are added only where the provider supports them: Calendly (find and cancel), Acuity and Cal.com (find, cancel, and reschedule, following the toggles you set), and the built-in engine, which adds a workspace-wide set. Cal.com and the built-in engine identify the caller by phone number first and fall back to email plus full name; for seated Cal.com events only the caller’s own seat is cancelled or moved. meetergo, eTermin, and HighLevel calendars currently offer availability and booking only — the assistant can read slots and book on them, but not look up, cancel, or move an existing appointment during a call, so their editors don’t offer Cancel or Reschedule.
The same tools work in chat and email conversations. There, the contact’s phone number, email address, and name only count as proof of identity when the channel verifies a single sender, for example WhatsApp or an authenticated email. In email threads, tickets, and group chats the assistant asks for the booking email and full name before it looks up an appointment.
If more than one integration is assigned, tool names get the integration name as a suffix (for example check_availability_sales). Slots are always spoken in the assistant timezone — set it in the assistant’s settings.
Calendly bookings can’t be rescheduled through its API — a caller who wants a different time gets a fresh
cancel_appointment and book_appointment instead, or reschedules through the link in their Calendly confirmation email.Reschedule or cancel a Cal.com appointment
What the workspace needs
- Connect Cal.com under Booking → Integrations, select the event type and check the timezone.
- Enable Cancel, Reschedule, or both on that connection. Booking is a separate permission.
- Assign the connection in Assistant settings → Tools → Calendar integrations.
- Set the assistant’s Primary language and any Secondary languages. Questions and confirmations follow the supported conversation language; customers do not need to know tool names or booking IDs.
What the caller needs
No prompt variable is needed for automatic telephone matching. For reliable matching, enable the phone question on the Cal.com event type and collect the customer’s number with its country code. Make it required if your process depends on finding bookings by phone. A number known to your CRM cannot match a Cal.com booking unless it is also stored on that booking.
What happens in the conversation
The customer can simply say “I would like to move my appointment.” The assistant finds upcoming appointments for the connected event type, reads back the matching date and time, and asks which appointment the customer means if there are several. For a move, it checks available times and confirms the selected new time with the customer. For cancellation, it asks for explicit confirmation of the appointment to cancel. The customer never has to supply a booking ID. The assistant reports success only after Cal.com accepts the change. If no appointment matches, it asks for the booking email and full name; it does not claim that anything was changed. Cancellation cannot be undone. For a seated event, only the matched attendee’s seat is changed.Booking questions
Event types on the built-in engine can ask for more than a name and an email address. In the event type editor, the Booking questions section below the description lets you add custom questions — short text, long text, email, phone, address, URL, number, a single checkbox, checkbox group, radio group, select, multi-select, or multiple email addresses — each with its own label, an optional placeholder, and a required toggle. Name is always required. Switch Email and Phone between required and optional in Booking questions. Email remains required for Google Meet and Microsoft Teams so the provider can deliver the meeting invitation. The booking page and phone assistant follow the same requirements. Every question gets an identifier (derived from its label, editable) that doubles as a URL parameter for prefilling the public booking page, e.g.?name=Jane+Doe&email=jane@example.com&company=Acme — repeat the parameter or use a comma-separated list for a multi-value field. A question can also be marked Disable input if the URL identifier is prefilled, which makes it read-only whenever that parameter is present — useful when an embedding page already knows the answer.
Assistants read these requirements automatically, no extra prompt needed: on the built-in engine, check_availability states in plain English what to collect before booking — for example “To book, collect: full name; email address (user@domain.tld); phone number in E.164 format (e.g. +4915123456789); Company (required, short text)…” (the message continues with a reminder never to confirm a booking before the booking tool succeeds) — and book_appointment requires exactly those fields, one parameter per question. It never reports a successful booking unless the underlying request actually succeeded. Cal.com always requires a full name; the selected event type determines whether email, phone, and custom answers are required. Other external providers ask for a full name and an email address.
Custom answers appear on the booking record — in the dashboard, under answers in GET /api/v1/bookings/{id} and the get_booking/list_bookings MCP tools, in the guest and host confirmation emails, in the ICS invite, and in every booking webhook payload (creation, cancellation, and reschedule).
Booking email templates
Header, footer, logo and colors come from your workspace or whitelabel email branding. The preview shows only the editable subject and message. Open Booking → Event types, create or edit an event type, then select Booking emails. A compact editor separates Guest emails (confirmation, cancellation, rescheduled, reminder) from Host notifications (new booking, cancellation, rescheduled). The editor displays the actual standard subject and message. Select English, German, French or Spanish to inspect the standard text, edit it directly, insert booking variables at the cursor, or open Preview with example booking details. Reset to standard restores automatic defaults for the selected message. Standard emails follow the recipient’s language; custom text is sent as written. Empty subjects or messages use the corresponding standard text. Choose a verified From address, or keep Automatic sender. Apply changes returns to the event type; Create event type or Save changes saves the configuration. Cancel in the email editor discards its draft. Reminders are sent only when a reminder time is configured on the event type. Calendar invitations and their attachments remain separate from the editable message text. The public API (GET /api/v1/booking-email-templates) returns all standard templates and supported variables. Use the event-type create/update API or MCP tools to save custom messages; the MCP tool get_booking_email_templates reads the defaults without sending mail.
Time format
Choose 12h or 24h beside Weekly availability. The saved choice also controls time variables in host emails and the email preview. Guests keep the format they selected on the public or embedded booking page for confirmation, cancellation, rescheduling and reminder emails. Older bookings without a saved guest choice use the event type’s format. Switching formats does not change availability, timezones or booked instants.Plan gating
Your plan must include Calendar integrations. If it is not included, you cannot create integrations.Reconnecting an expired connection
Google Calendar, Outlook Calendar, Calendly, Acuity Scheduling, and HighLevel connections can expire — the account’s password changed, access was revoked, or the stored refresh token lapsed. Famulor detects this the moment a refresh fails and flags the connection immediately, instead of waiting for a booking to fail.- The affected row in Booking → Integrations shows an amber Reconnect required badge with a short reason, and a banner at the top of the tab counts how many connections need attention.
- Click Reconnect (↻) on the row to sign in again. Google, Outlook, Calendly, and Acuity return you to the same Booking → Integrations tab; for HighLevel the sign-in flow returns you to Automations → Connections instead — pick the same sub-account you originally connected, or reconnecting creates a separate connection.
- CalDAV/ICS calendars have no OAuth reconnect: click Edit on the row to update the app password or feed URL.
connection_status and needs_reauth so you can monitor connection health programmatically.
Troubleshooting
Cal.com: "Invalid API key" or event types won't load
Cal.com: "Invalid API key" or event types won't load
Confirm the key is still active in Cal.com and that you pasted a live key (Cal.com’s live keys begin with
cal_live_), then select Load event types again. If you get an authentication error instead of an empty list, you likely picked the wrong API endpoint — an EU Cal.com account needs the EU endpoint (or Custom for a self-hosted instance), not the US default.Cal.com: the assistant keeps asking for an email, or the booking never completes
Cal.com: the assistant keeps asking for an email, or the booking never completes
book_appointment requires a valid email address when the selected Cal.com event type makes email mandatory. Spoken addresses (“anna at example dot com”) and German umlauts are converted automatically before the request goes out, so most dictated addresses work; if what the assistant heard still isn’t usable, it is told to ask again rather than booking. When email is required, tell it in the prompt to collect and confirm the address before booking, and to reuse an address you already hold as a call variable instead of asking twice.Calendly: "Specified location kind is not configured for this event type"
Calendly: "Specified location kind is not configured for this event type"
The event type’s only location in Calendly is a video-conferencing link (Google Meet, Zoom, Teams), and the voice agent can’t generate meeting links. In Calendly, edit the event type and add Custom or Phone Call → Inbound call as a location — Custom is the safest choice and works in every case. If the event type ends up with more than one location, pick the right one under Meeting location in the integration.
Calendly: some team event types are missing
Calendly: some team event types are missing
In a Calendly organization, admin and owner accounts see every member’s event types, including Round Robin and Collective events; a regular member account only sees its own.
Bookings behave differently in a browser test than on a real call
Bookings behave differently in a browser test than on a real call
A Web Call test runs without a phone number, so anything the booking flow derives from the caller’s number (sending a scheduling link by SMS, looking an appointment up by phone) can’t work the same way. Use Test → Call in the assistant header for a realistic run: the assistant dials a number you enter, or you dial its inbound number yourself.
API & MCP
Everything above is available in the public REST API and as MCP tools athttps://<your-domain>/mcp:
Integration objects include
connection_status / needs_reauth.
Listing Calendly and Acuity accounts, event types, appointment types and calendars, loading meetergo meeting types and checking meetergo availability read connected accounts: a workspace API key only needs integrations:read, while a user-authorised credential also needs the workspace owner or admin role.
Creating, changing, deleting or assigning calendar integrations, connecting Calendly or Acuity, and booking with meetergo need a user-authorised credential with the workspace owner or admin role; a workspace API key gets 403 for these actions.
Event types, connections, and booking records for the built-in engine are covered in Built-in calendar.
meetergo
In the App Store, choose Add connection on the meetergo card to create another connection, or Manage connections to edit a saved one. In Booking → Integrations, choose meetergo. Enter a personal access token with scheduling access from meetergo’s Integrations → API, select Load meeting types, then choose the meeting type and timezone. Platform API keys additionally need an Acting user ID; leave it empty for a personal token. Save and assign the calendar to an assistant. Allow booking controls whether the assistant may book or only check availability. The native connection works in voice calls and text conversations. It offers exact bookable starts for the selected meeting type, including its duration and buffers. The assistant collects a full name and email and checks the selected time again before booking. A booking awaiting attendee or host confirmation is reported as pending. If a request has an unknown outcome, check the calendar before trying again. For additional operations such as rescheduling and cancellation, connect meetergo MCP under Apps, enter your personal token, and select the tools your assistant needs. You can use it alongside the native connection. The scheduling endpoint ishttps://mcp.meetergo.com/mcp; the separate documentation MCP only searches meetergo’s documentation. See the official MCP guide.
Public API discovery: POST /api/v1/integrations/meetergo/meeting-types. Availability and booking: POST /api/v1/integrations/meetergo/action. The corresponding MCP tools are list_meetergo_meeting_types, get_meetergo_availability, and book_meetergo_appointment. Use the regular integration create/update and assistant-assignment endpoints to save and assign the connection.