

Create and route the Telnyx connection
- In Famulor, open Settings → Phone numbers → Add a number → Add SIP integration. Select the SIP region and copy the hostname from the SIP URI.
- In the Telnyx portal, open Voice → SIP Trunking → Create SIP Connection. Give the connection a name and choose FQDN.
- Under Authentication and routing, use Add FQDN with DNS record type A. Enter your Famulor hostname and port 5060 for TCP. Select that FQDN as the primary inbound destination.
- Under Outbound calls authentication, choose Credentials and save the username and password. In Outbound, attach an Outbound Voice Profile.
- In Inbound, set the called and caller number formats (DNIS and ANI) to +E.164, choose the inbound SIP region and set the transport to TCP. Under Numbers → My Numbers, assign your number to the connection. Telnyx connection types · Inbound and outbound settings.
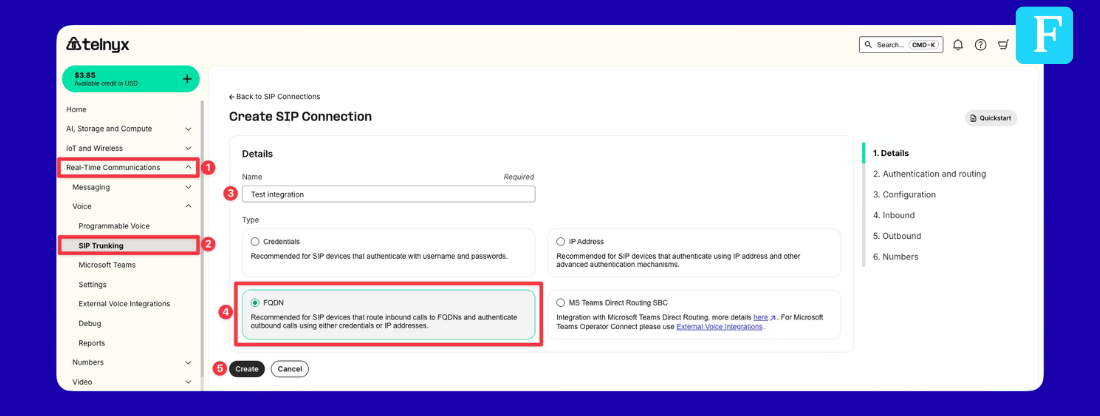
Choose FQDN when you create the Telnyx connection.
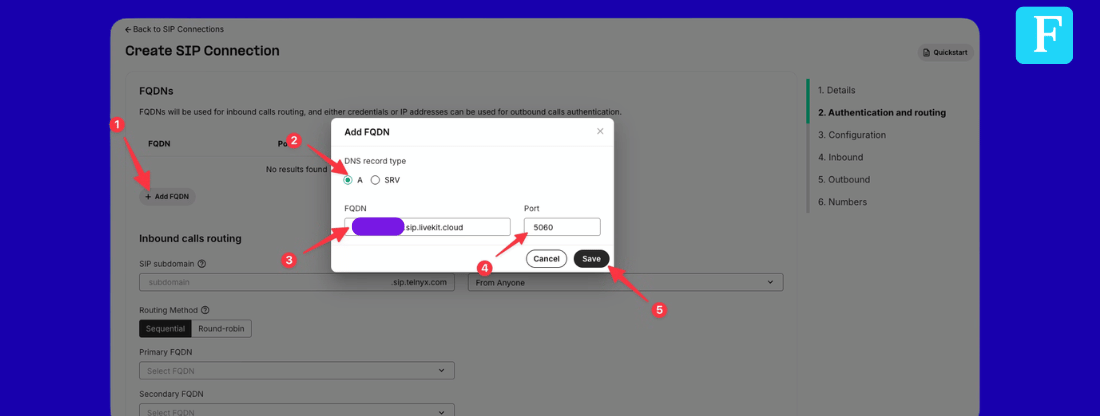
Add the Famulor hostname to the connection’s FQDN destinations.
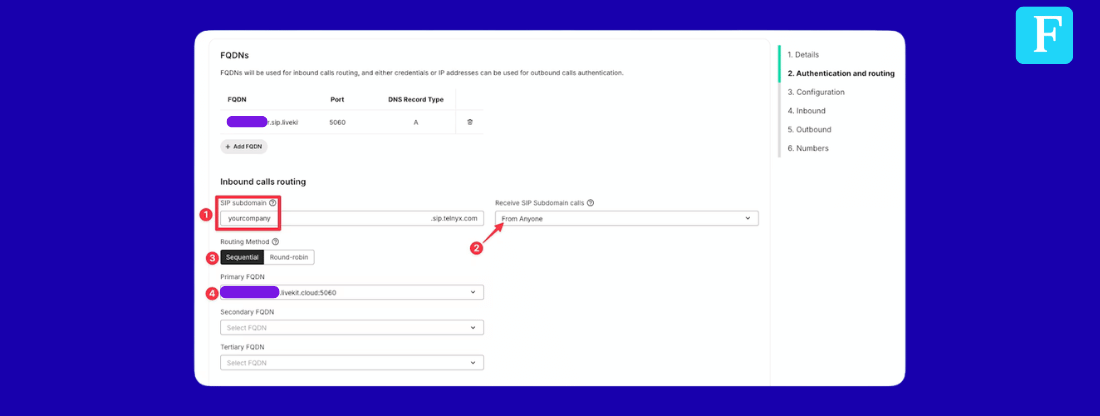
Select the FQDN destination for inbound routing.
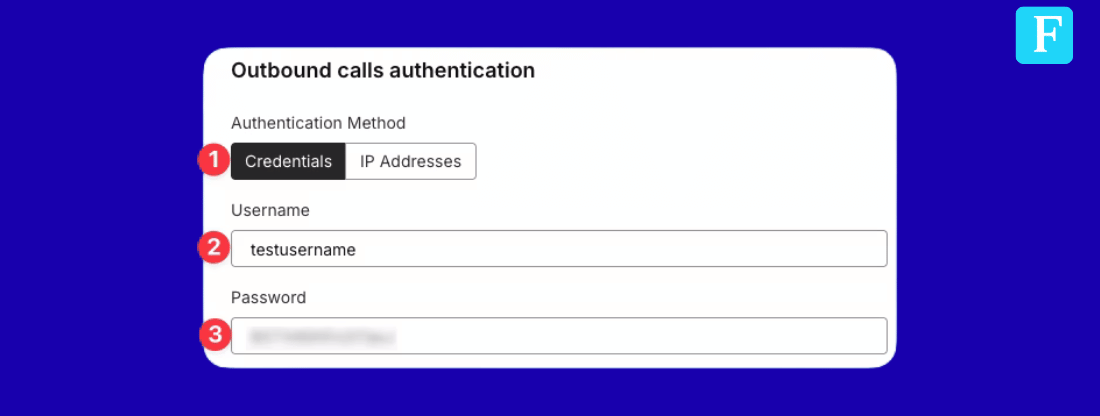
Set Credentials for the calls Famulor sends to Telnyx.
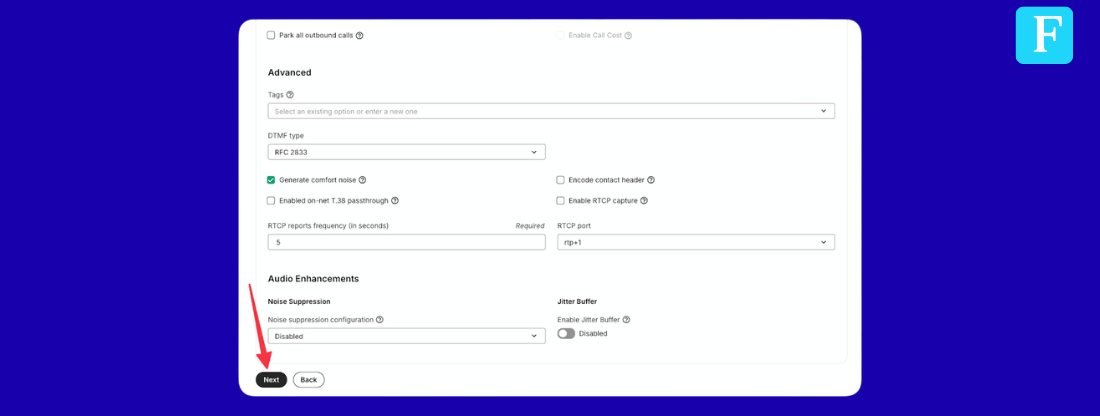
Review the connection configuration before continuing to inbound and outbound settings.
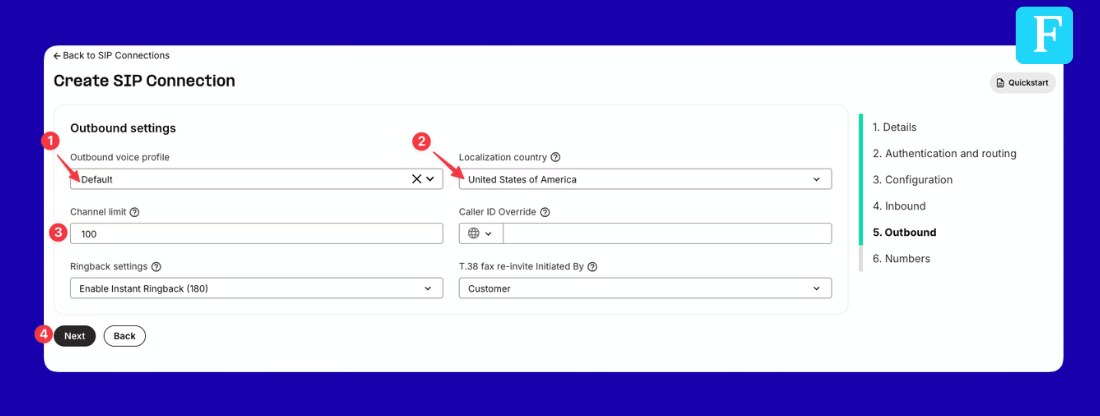
Select the Outbound Voice Profile on the connection.
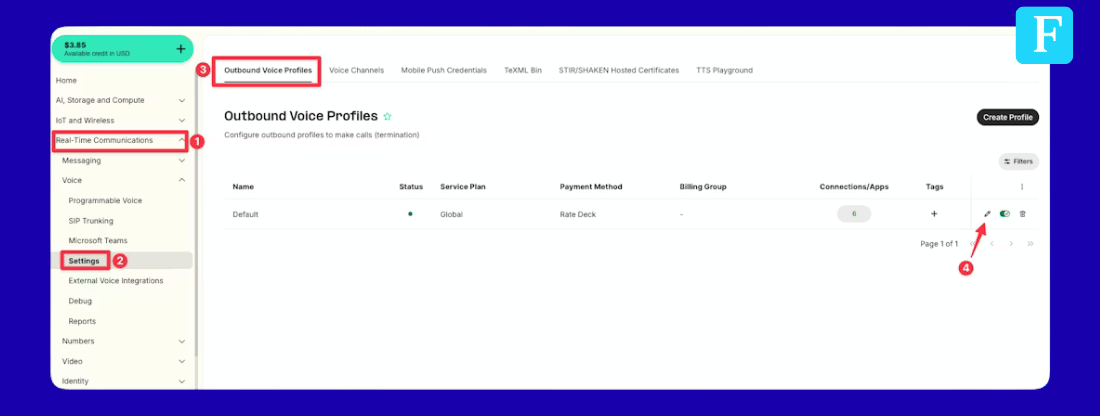
Open the outbound voice profile assigned to this connection.
Complete the SIP integration in Famulor
Enter the exact Telnyx DID in+E.164 as Phone number (DID). Set Inbound authentication to Provider source IPs and enter both addresses for the Telnyx connection’s inbound region. For outbound, set Termination address to sip.telnyx.com and use the credentials created in Telnyx. Save the trunk and assign the number to an assistant.
Allow both signaling addresses for the connection’s selected inbound region:
Use TCP 5060 for standard signaling; Telnyx also supports TLS 5061. Re-open the Telnyx live network page before saving because regional addresses can change.
What to enter in Famulor
The screenshots use the English app labels.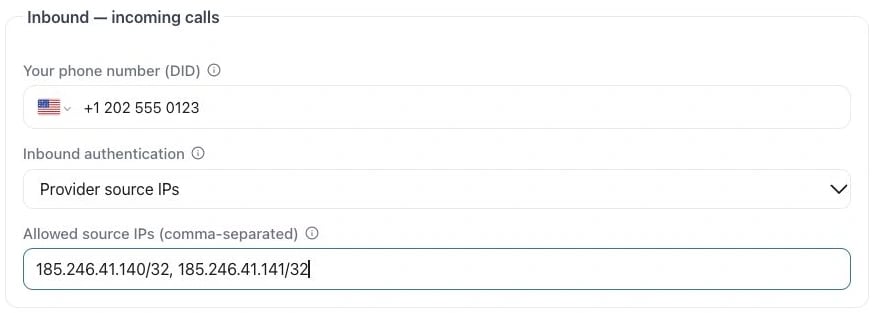
Example for Telnyx Europe. Use the two signaling addresses for your Telnyx region.
- Your phone number (DID) · Enter the exact number delivered by Telnyx, with its country code and leading + for an E.164 DID.
- Inbound authentication / Allowed source IPs · Choose Provider source IPs and enter the complete SIP signaling list for Telnyx and the selected route.
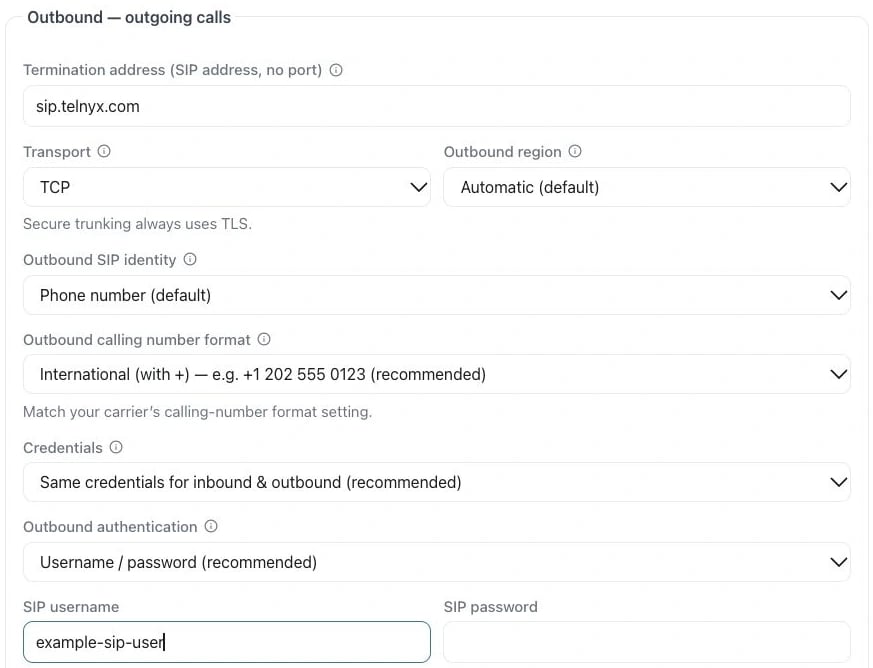
Example in the English app
- Termination address · Use the provider hostname from the setup above (sip.telnyx.com). Enter only the hostname, without a SIP prefix or port.
- Outbound authentication / SIP username / SIP password · Select Username / password when using Digest. Enter the SIP login and password from Outbound calls authentication → Credentials.
Troubleshooting
Outbound calls fail with a 403 and “Dialed number is not included in whitelisted countries” — the connection’s Outbound Voice Profile restricts destinations by default. Open that profile’s Allowed Destinations and add the countries you need. A connection with the right FQDN and IP allowlist still won’t complete outbound calls to a country that isn’t explicitly enabled there.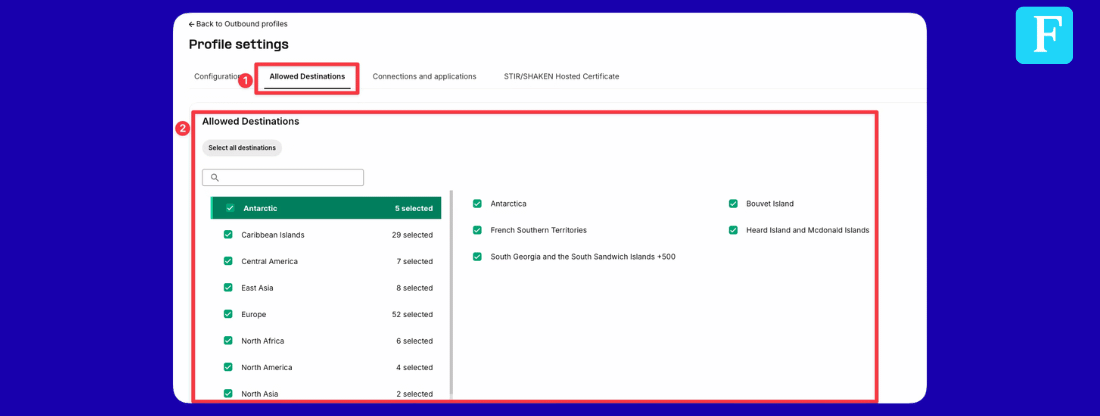
Open Allowed Destinations in the outbound profile used by this connection.