

Create the Sinch trunk
- Open Elastic SIP Trunking → Trunks → Create New SIP Trunk in the Sinch Build Dashboard. Choose the name and domain, then save the trunk. Copy its termination hostname, such as
example.pstn.sinch.com. - In Famulor, copy your SIP URI from Settings → Phone numbers → Add a number → Add SIP integration. In Sinch, choose Add an Endpoint → Static and route it to the Famulor host. Use port 5060 and TCP, or port 5061 and TLS for an encrypted trunk. If your Sinch portal only accepts an IP address, ask Sinch for FQDN routing for your account. For a combined target field, enter the host followed by
:5060;transport=tcpor:5061;transport=tls. Sinch trunk creation. - Assign your DID to the Sinch trunk. In the trunk’s Outbound call settings, configure Digest credentials and enable the countries you call. Sinch outbound settings.
- In Famulor, enter your DID in
+E.164, the Sinch trunk domain as the Termination address, and the Sinch Digest credentials under Outbound authentication. Use Provider source IPs for incoming calls and add the networks below.
What to enter in Famulor
The screenshots use the English app labels.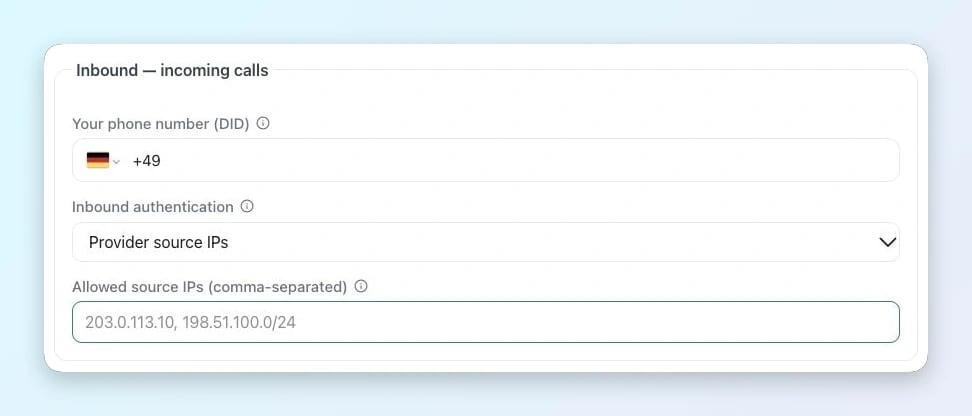
Incoming calls in Famulor
- Your phone number (DID) · Enter the exact number delivered by Sinch, with its country code and leading + for an E.164 DID.
- Inbound authentication / Allowed source IPs · Choose Provider source IPs and enter the complete SIP signaling list for Sinch and the selected route.
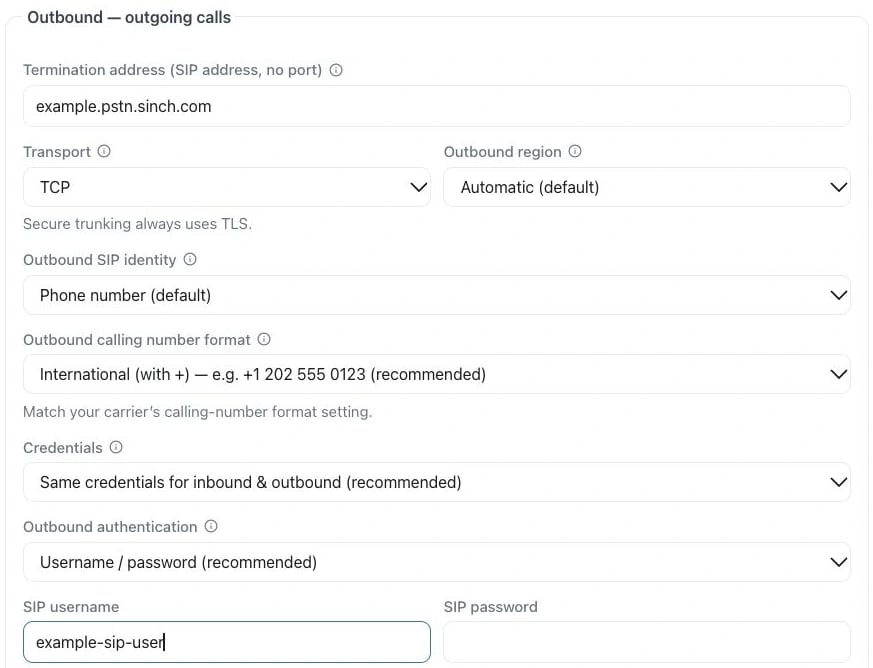
Example in the English app
- Termination address · Use the provider hostname from the setup above (example.pstn.sinch.com). Enter only the hostname, without a SIP prefix or port.
- Outbound authentication / SIP username / SIP password · Select Username / password when using Digest. Enter the SIP login and password from Outbound call settings.