

Settings is organized into five groups in the sidebar: General, Workspace, Legal, Communications, and Advanced. This page walks through each one.
General
Branding
Set the app name shown to your customers throughout the product (blank uses the platform default), a support email, and your brand colors — primary, accent, a neutral gray, and the header color used in transactional emails. These colors drive the accent used across your white-label admin console and the customer-facing app. Open Whitelabel Admin → Settings → Branding. Enter App name and Support email, choose the brand colors, then select Save.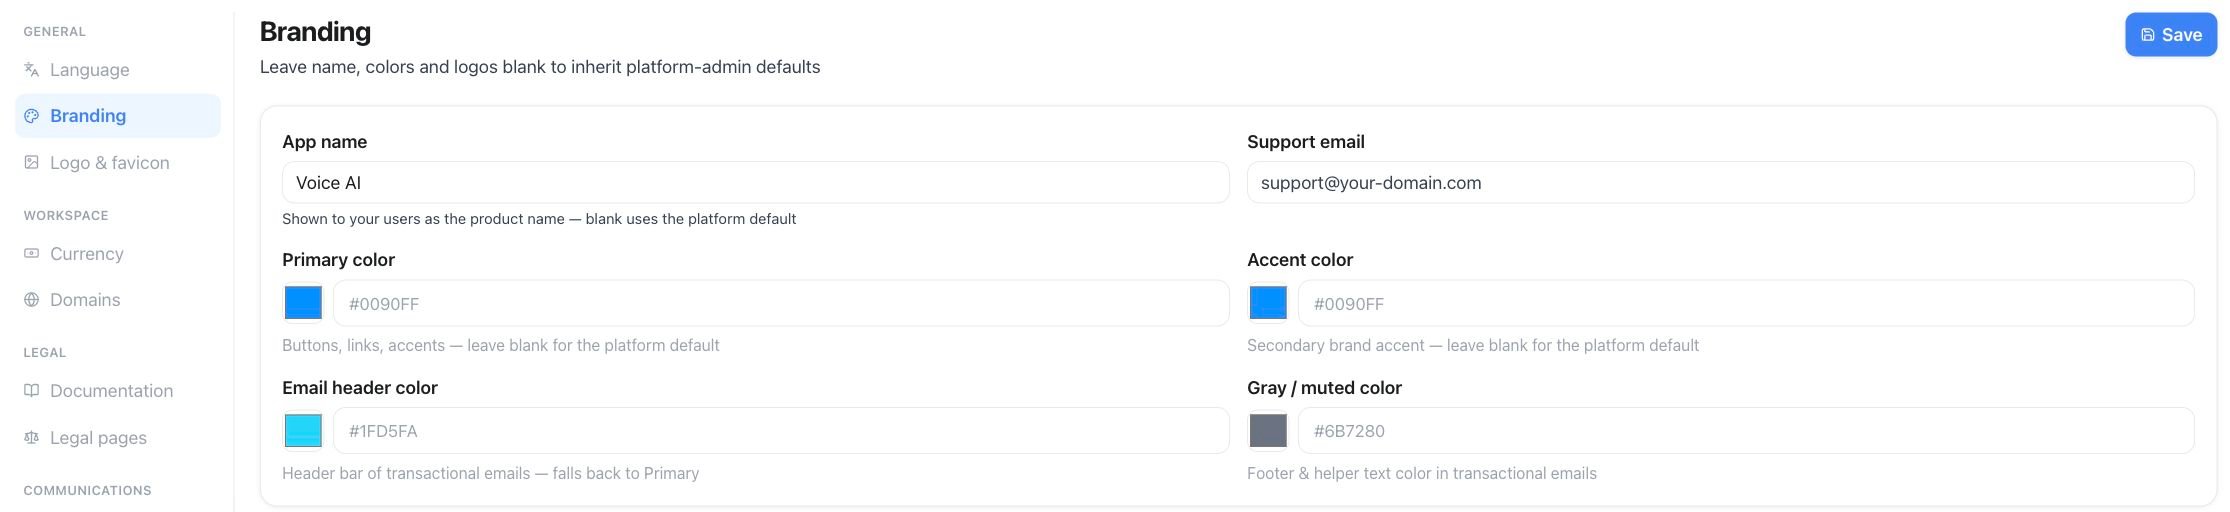
Branding — app name, support address and color controls
Logo & favicon
Open Settings → Logo & favicon. Use Upload logo, Upload dark logo, and Upload favicon to add the assets for each display context. Uploads and removals apply immediately. Remove an asset to fall back to the platform default logo.
Logo & favicon — separate uploads for the light logo, dark logo and favicon
Workspace
Currency
Choose the display currency your customers see at checkout and throughout the product. Stored prices always remain in EUR internally — Famulor converts to your chosen currency at a platform-managed exchange rate for display only.Domains
Connect the custom domain your customers use for the app, login, the public API (/api/v1), and MCP.
Open Whitelabel Admin → Settings → Domains, enter your hostname in Custom domain, then select Add domain. The screenshot shows the form before a domain has been added; the DNS records appear in the next step.

Domains — add your hostname before publishing and verifying DNS records
1
Add your hostname
Enter the full hostname you want to use (e.g.
app.your-brand.com).2
Publish DNS records
Publish the ownership TXT record shown in the setup, then the recommended A or CNAME record for routing.
3
Verify
Wait for DNS propagation, then choose Check DNS. The domain activates once ownership, routing, and certificate checks all succeed.
GET, POST, and DELETE /api/v1/custom-domain, POST /api/v1/custom-domain/verify, and the matching MCP tools. See White Label Program for what becomes available once your domain is verified — bot protection, for example, requires a verified custom domain.
Legal
Documentation link
An optional Docs URL. When set, it appears as an info icon next to Create key in Settings → API & MCP, pointing your customers at your own API documentation instead of Famulor’s.Legal pages
Privacy Policy URL and Terms of Service URL — shown as links on your login and registration pages. Leave either blank to use the platform default.Communications
Custom SMTP server
Send transactional email to your customers through your own mail provider instead of the platform default. Configure host, port, username, password, encryption (e.g. TLS), and the From name and From address. Use Send test email to confirm the connection before relying on it — the saved password is never shown again after saving, only whether one is set. Open Whitelabel Admin → Settings → SMTP to enter your mail-server and sender details. Save the configuration, then use Send test email to check delivery.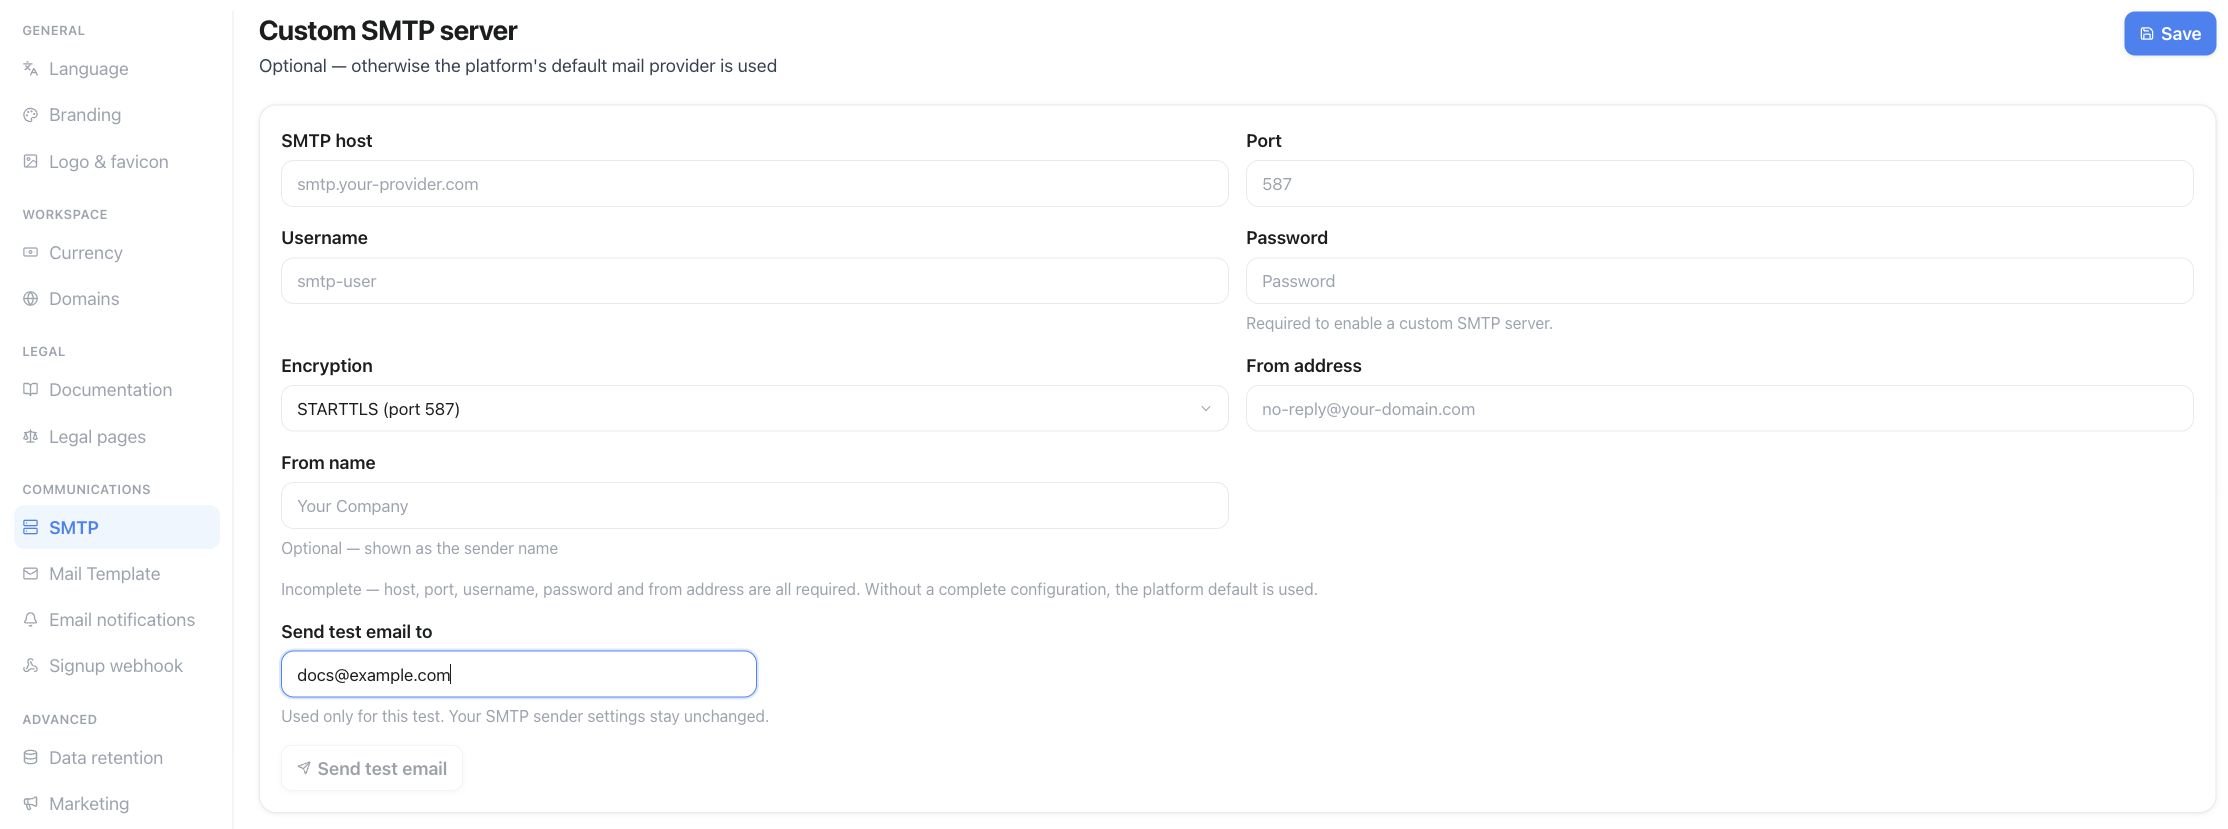
SMTP — unconfigured server and sender fields
Mail template
The welcome email sent right after a customer creates an account. Leave fields blank to use the default text; the default contact address falls back to your support email from Branding.Email notifications
Open Settings → Email notifications. Turn each notification on or off, then select Save. Notifications are enabled by default. The labels match the switches in the product: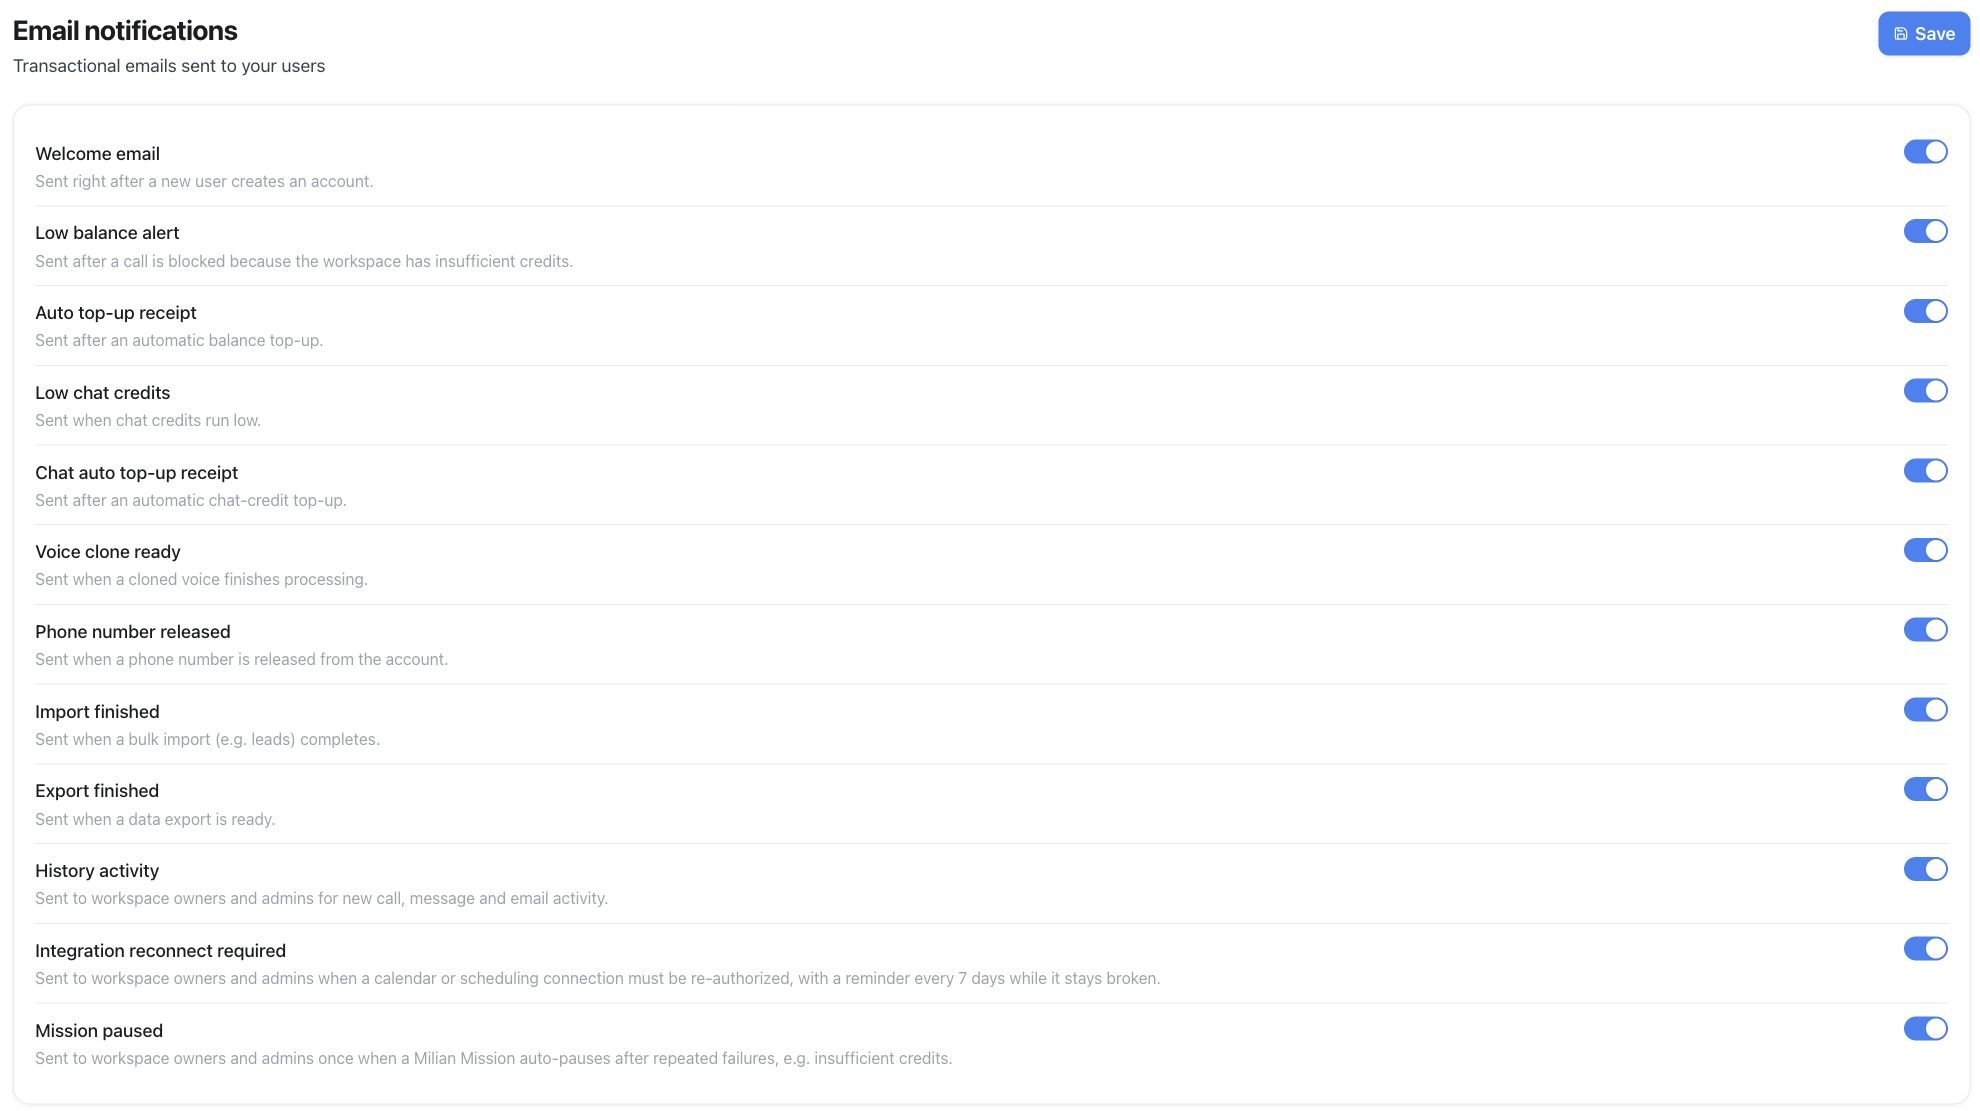
Email notifications — switches for customer account and activity emails
Dunning emails (“Account suspended — payment required”) always send regardless of these toggles — they are a billing safeguard, not a marketing notification.
Signup webhook
An HTTP callback fired whenever someone signs up on your domain — use it to sync new customers into your own CRM or onboarding system.Advanced
Data retention limits
Set the min/max range (1–24 months, or immediate deletion) your customers can choose for their own data retention in Settings → Data Retention. This is separate from the default retention period you set on each plan; the range here only bounds what a customer is allowed to pick for themselves. Limits can be set per data channel (calls, leads, email, SMS, WhatsApp, and each connected messaging channel). Open Whitelabel Admin → Settings → Data retention. Set the permitted minimum and maximum for each channel, then select Save.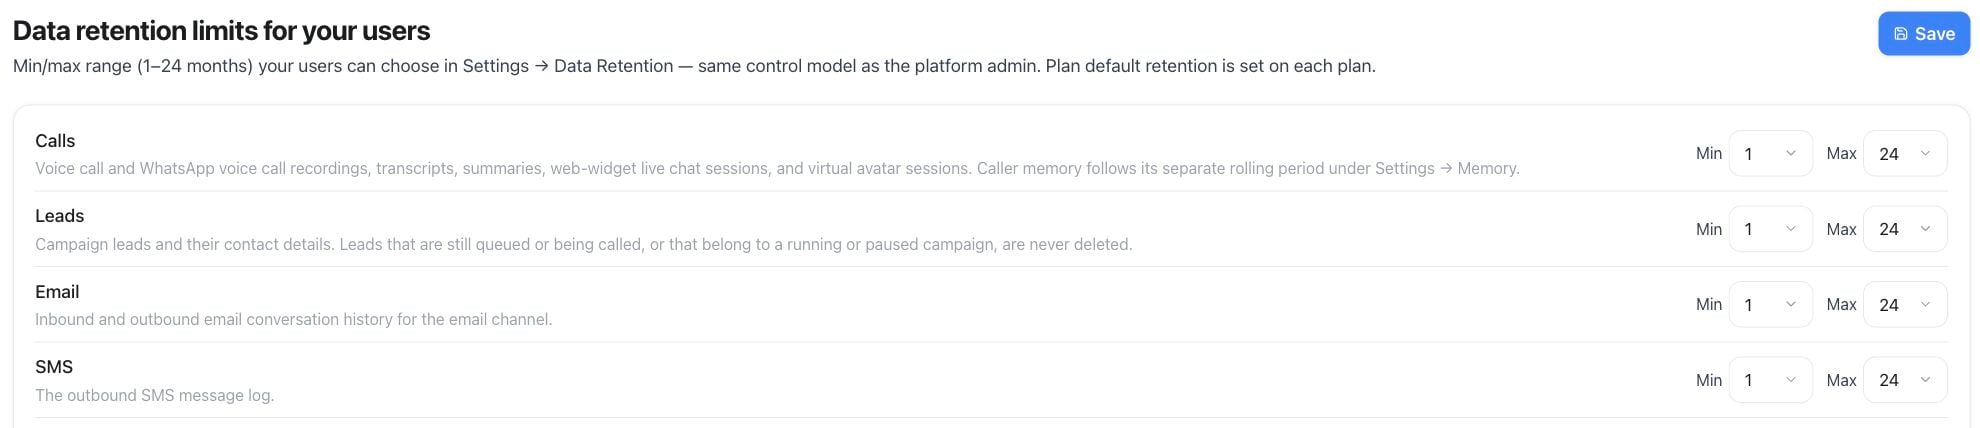
Data retention — minimum and maximum periods customers may choose
Marketing integrations
Configure GA4, Meta Pixel, Google Ads, and Microsoft UET tags for your verified custom domain — see Marketing integrations for the full event list and setup.Custom scripts
Raw HTML/<script> injected into your white-label pages — one field for all pages, one for auth pages only (login/register). Use this only for tags not covered by a guided field above; use with care, since this content runs unvalidated in your customers’ browsers.
Bot protection
An optional Cloudflare Turnstile challenge on your signup form, available once your custom domain is verified.API and MCP
Most of Settings is dashboard-only — branding, logos, legal pages, SMTP, mail template, email notifications, the signup webhook, and custom scripts are configured in Whitelabel Admin → Settings, not through the public API. Marketing integrations are the exception: they’re readable and writable throughGET / PUT /api/v1/settings/marketing and the MCP tools get_marketing_integrations / update_marketing_integrations — see Marketing integrations. The custom-domain workflow also has a dedicated API — see White Label Program.
See also White Label Program for the customer-workspace model this configuration applies to, and White Label Platform for where these settings show up in your reseller dashboard.