> ## Documentation Index
> Fetch the complete documentation index at: https://docs.famulor.io/llms.txt
> Use this file to discover all available pages before exploring further.
# Flow builder overview
> Turn a call into a graph of agents, tools, and decisions
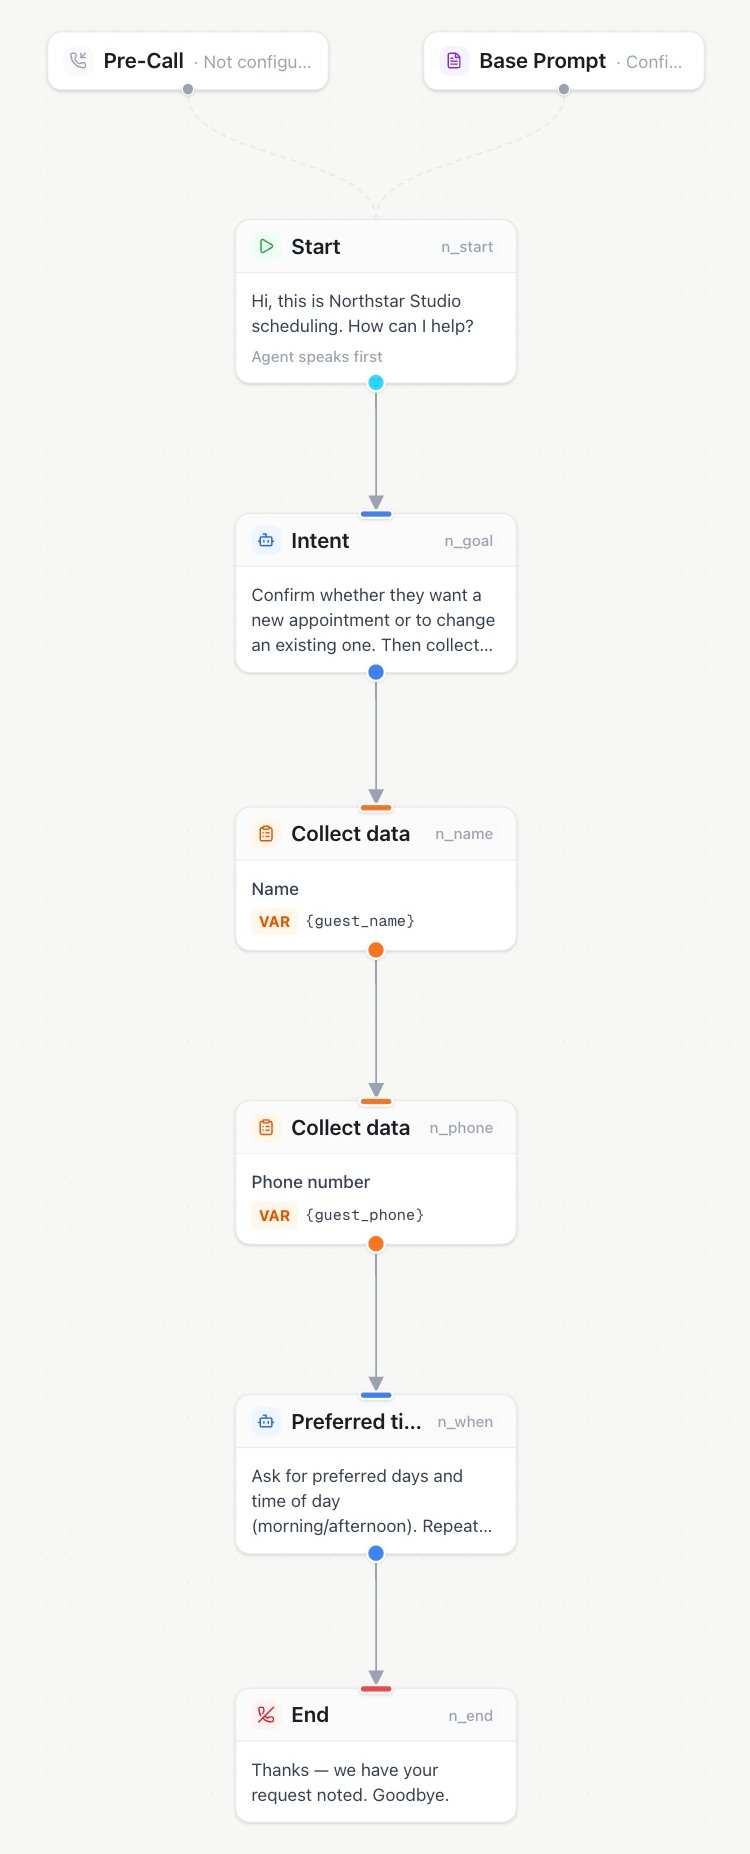
The flow builder is a visual canvas where you design a call as a **graph**: nodes do the work, and edges define where the conversation can go next. Each Agent node handles one part of the conversation, and moving along an edge hands the conversation to the next node.
## Video tutorial (6 min)
Watch the complete walkthrough: create a Conversational flow assistant, open the builder, and learn what every node does — Pre-Call, Base Prompt, Start, Agent, Condition, Collect data, Transfer, Tool and End — plus connecting nodes, validation, saving and testing.
## Nodes and edges
* **Nodes** are steps: greet, converse, decide, call an API, collect data, transfer, end.
* **Edges** are possible paths. An agent node with three outgoing edges can hand the conversation to three different next steps.
* **The assistant chooses the path** based on the conversation and, crucially, on your **edge labels**.
## Start from a use-case template
When you create a Conversational flow assistant, the template gallery offers complete blueprints for common outcomes such as callback intake, lead qualification, surveys, concierge experiences, and website assistants. A blueprint can include:
* a ready-to-edit flow graph, base prompt, and first message;
* the expected outcome and supported surfaces, such as inbound phone, outbound phone, web voice, or AI avatar;
* a setup checklist for anything the use case still needs, such as a knowledge base, calendar, transfer destination, or web widget.
The badges in the gallery let you compare the flow size, supported surfaces, and required setup before you create the assistant. Applying a template copies the blueprint into your new assistant. It is a starting point, not a live link: later template updates do not overwrite your assistant.
An **Avatar-ready** blueprint prepares the conversation for a speaking virtual avatar on the web. The avatar is part of the web session's presentation layer, not a node in the flow graph. After creating the assistant, connect it to a web widget and choose the virtual avatar there. The picture shown on a template or assistant card is only a portrait and does not enable an animated avatar.
## Why edge and agent labels matter
This is the most important concept in the flow builder:
**Edge labels are not decoration.** The assistant uses each outgoing label to decide where to hand off the conversation. Vague labels produce vague routing.
Compare:
| Weak label | Strong label |
| - | - |
| `next` | `caller wants to book an appointment` |
| `option 2` | `caller asks about pricing or invoices` |
| `transfer` | `caller explicitly asks for a human, or is angry` |
The same applies to Condition nodes: the node's **description** explains what is being decided, and each edge label describes one outcome. The assistant must pick exactly one edge, so the labels should be mutually exclusive and cover all expected cases.
Agent node **names** matter too: they appear in handoffs and call details, so `Qualification agent` is clearer than `Agent 2`.
## A minimal useful flow
```mermaid theme={null}
flowchart TD
Start(["Start: greeting"]) --> Reception["Agent: Reception"]
Reception -->|"caller wants an appointment"| CollectName["Collect: name"]
CollectName --> CollectPhone["Collect: phone"]
CollectPhone --> EndA(["End: confirm & goodbye"])
Reception -->|"caller has a billing question"| Billing["Agent: Billing FAQ"]
Billing --> EndB(["End"])
Reception -->|"caller asks for a human"| Warm["Warm transfer: +49..."]
Warm --> EndC(["End"])
```
## Flow variables
Collect nodes store results in **flow variables** such as `customer_phone`. Variables are included in the public `call.completed` webhook and the call details, so connected systems receive structured data, not just a transcript. Send DTMF nodes perform an action and continue along their outgoing edge; they do not create a result variable.
## Fallback behavior
* An Agent node with **empty instructions** uses the assistant's Advanced prompt as its base. Node-specific instructions are added to that base.
* A Collect node that fails after its retry allowance takes the outgoing edge labeled **Failed** if one exists, otherwise the normal edge.
* If a flow step cannot run, the call follows the available fallback path and records the issue in the call details.
Continue with the [node reference](/flow-builder/nodes) and [best practices](/flow-builder/best-practices). For when to reach for a flow instead of a plain prompt, see [System prompt vs. flow builder](/assistants/overview).
## Arrange and center the canvas
Use **Center flow** beside the zoom buttons to bring the entire graph into view. Use **Tidy up flow** to arrange nodes from top to bottom with spacing for branches and shared steps. Retry connections stay intact. Only node positions change; instructions, tools, conditions and call settings are preserved. Click **Save** to keep the new layout.
You can also ask Milian to “tidy up this flow and improve the spacing.” In the assistant editor, Milian arranges your current draft, including unsaved edits.
For integrations, `POST /api/v1/assistants/{id}/flow/layout` arranges and saves the existing graph with assistant write access. No request body is needed. The response reports the assistant ID, whether it was saved, and node and edge counts; read the assistant to retrieve its new layout. The equivalent MCP tool is `tidy_assistant_flow`. Advanced flows require Flow Builder access.
This documentation is built and hosted on [Mintlify](https://mintlify.com), a developer documentation platform.
 ## Start from a use-case template
When you create a Conversational flow assistant, the template gallery offers complete blueprints for common outcomes such as callback intake, lead qualification, surveys, concierge experiences, and website assistants. A blueprint can include:
* a ready-to-edit flow graph, base prompt, and first message;
* the expected outcome and supported surfaces, such as inbound phone, outbound phone, web voice, or AI avatar;
* a setup checklist for anything the use case still needs, such as a knowledge base, calendar, transfer destination, or web widget.
The badges in the gallery let you compare the flow size, supported surfaces, and required setup before you create the assistant. Applying a template copies the blueprint into your new assistant. It is a starting point, not a live link: later template updates do not overwrite your assistant.
## Start from a use-case template
When you create a Conversational flow assistant, the template gallery offers complete blueprints for common outcomes such as callback intake, lead qualification, surveys, concierge experiences, and website assistants. A blueprint can include:
* a ready-to-edit flow graph, base prompt, and first message;
* the expected outcome and supported surfaces, such as inbound phone, outbound phone, web voice, or AI avatar;
* a setup checklist for anything the use case still needs, such as a knowledge base, calendar, transfer destination, or web widget.
The badges in the gallery let you compare the flow size, supported surfaces, and required setup before you create the assistant. Applying a template copies the blueprint into your new assistant. It is a starting point, not a live link: later template updates do not overwrite your assistant.